 So more progress has been made into creating the window for my detectives office entrance, I have now been able to adapt the lessons learnt from online tutorials into making a transparent glass texture and mix into my own practices of creating the bumped misty glass. As you can see below, here is the updated nodes in my shader for creating the bumped effect.
0 Comments
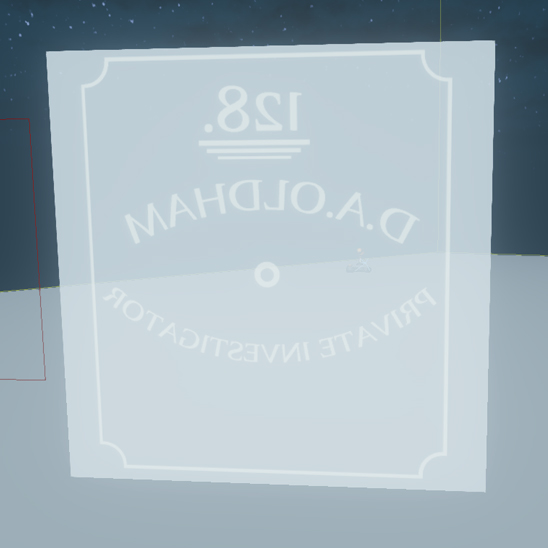
After looking into a lot of references to the offices of Detectives in Noir Films as show in earlier posts, I have been noticed a recurring use of logos on the front office window. Looking into the 1940's design and type of that era, from the image below you can see the design that I had created for the entrance of my office environment. As you can see the type on the window is backwards as it should be right-way-round to someone on the other side of the door. I am very happy with the overall outcome of this design with the detail and style of the logo.
I made the glass texture using the 'opacity' and 'constant' materials in UDK, I then loaded in the logo design and used an 'add' module to overlap on top of the 'opacity' modifier hence creating a solid shape that lies on top of the glass, in this case, the logo for the Detective's Office. (below is the material layout for creating the glass) The design and colouring still needs work, I am going to add displacement onto the glass creating a frosted effect, this will help to bring out the logo into the environment. As well as displacement I will work on colouring of the logo into black as intended in the original design. 
| 
 Dale OldhamM2110254I am a Final Year Student at Teesside University, this will be a space for my updates as to where I am heading in the design and production processes of my project.
ArchivesCategories | ||||||


 RSS Feed